When To Use Primer and Why It's So Helpful
Last week we chatted about the basics (and importance!) of prep work when painting furniture, and this week we are going to dive in a little deeper. You've cleaned your piece, repaired any damage, given it a little scuff sanding...but what about primer?? Is it necessary? Can you skip right over it? Let's chat...
What is primer for?

Stain Blocking
There are quite a few stains that can creep up through your paint and cause you all sorts of trouble, but the most frustrating can be tannins. Tannins are a substance derived from the acids inside plants. They serve all sorts of benefits in nature (particularly in fruit trees...if you bite into unripened fruit and get that pucker face, dry tongue, and acidic flavor, that's the tannins doing their job to deter you from eating the fruit before its ripe), they have been used for generations to tan animal hides, provide astringents needed in medicine, and even play a large roll in that glass of red wine you might be sipping (they leach out from the wooden barrels the wine is stored in and play a huge part in the flavoring and chemical breakdown of your fav cabernet). They also are used in many dyes and tints. Have you ever seen a body of water surrounded by mangrove trees? Chances are, that water has a brown tint, similar to tea....that's because tree roots are essentially steeping in the water, leaching tannins out of the bark, changing the color of the water. This is essential for plant life...but can be an absolute headache when painting furniture. When painting, particularly with water based products, tannins can bleed through your finishes and cause staining that is far from attractive. Sometimes, the tannins show up right away, but other times, they don’t appear until you add your last coat of varnish, or even worse, a few months later. This is particularly common in cherry, mahogany, and deeply tinted woods...those tannins show up in the form of ugly yellow streaks in your painting surface. Using a high quality, stain blocking primer can save HOURS of work by locking in all those tannins, stains, oils, and discolorations before you apply that first coat of paint. For optimal stain blocking abilities, apply TWO coats, and allow 4-6 hours to dry in between. After you’ve painted, be sure to wait 24 hours before adding a top coat!! When using a water based varnish, you can reactivate your water based paint, and reopen the pore space, allowing room for those tannins to leak back through. Waiting a solid day will give your paint enough time to begin the curing process and will help lock those tannins in beneath the primer.
Adhesion
If you are painting an old, dry, rough antique...you’ll likely have zero issues with your paint sticking to the surface. (Wise Owl Chalk Synthesis Paint is super porous so it's going to stick to most surfaces with ease! If you are using the One Hour Enamel...it's best to prime first! It’s incredibly tough, but not quite as adhesive as the chalk line, so primer helps a ton!) But what if your piece has a lacquered finish? What if it’s laminate, glass, ceramic, or even metal? Some surfaces are just too slick for paint to grip on to. You can give it a go with some sandpaper to rough up the surface and give your piece a little tooth, but lots of times that isn’t an option. If your piece has lots of intricate details...the idea of sanding them can be super daunting. For lots of projects, you can skip the heavy sanding and instead give it one quick scuff up and then prime instead. The primer will stick to just about all surfaces. (Be sure the surface is clean though!! Kitchen cabinets that have 10 years of bacon grease coated on them? Ain’t nothin gonna stick to that!) Do 2 coats of primer, with 4 hours of dry time in between, and you’re ready to paint! If a surface is super slick, I let the primer dry overnight to get the best possible adhesion before I jump into painting.
When in doubt….prime!!
The primer is water-based, low VOCs, washes out of brushes easily (wash as soon as you are done priming though! It dries incredibly tough!), and goes on just as easily as paint. It’s far better to prime when you don’t HAVE to than to skip priming and regret it later. If you are contemplating priming for adhesion issues, but you aren’t 100% sure you need to….paint a little 2”x2” section, let it dry for an hour, and then give it a little scratch with your fingernail. Does the paint peel off or scratch right up? You need to prime! (If it just leaves a white chalky scratch mark, you are totally fine! Go ahead and paint!)
Keep in mind...these are just the two most common reasons you’ll need primer. The list in reality is longer, and each project is different! Have a dresser that smells like years of cigarette smoking? Prime that baby and lock that stink in. Painting a dark oak table bright white?? Prime and save yourself coats and coats of paint! And as always, if you have any questions or you have a project that is stumping you….reach out! I’m always happy to do consultations to discuss your project and figure out the best plan of attack. These consults are always free of charge and customized to your particular project. Get one on one help choosing your prep steps, the perfect color combination, and the appropriate topcoat, so your piece ends up exactly as you hoped!
**************************************************************
Too long, didn't read? (Yeah, I see you! 😆) :
- Painting mahogany or cherry wood and using a light color: PRIME
- Painting slick surfaces: PRIME
- Painting something stinky: PRIME
- Not sure that your paint will adhere and you are on the fence about using primer: TEST IT (paint a 2x2" square and scratch it an hour later...if it scratches, you need to prep more!)
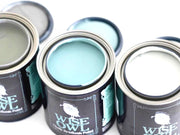
Be sure to grab your primer HERE, as well as all your Wise Owl Paint products!
-
Posted in
Furniture Painting Basics, Prep Work, Primer
